
How To Make Resin Molds?
Are you looking for a way to make beautiful and unique molded items? Making resin molds is not as complicated as it may seem - anyone can learn how with the right supplies and tutorial! This blog post will cover all the materials, steps, and techniques involved in making custom resin molds from start to finish.
Are you ready to get started? Let's dive into exactly how to make resin molds.
Materials Needed for Making Resin Molds
You will need silicone putty, acetate sheets, resin tape, amazing sealer, gloves, stir sticks as well as parchment paper for making resin molds.
Silicone putty
Silicone putty is an essential material for making resin molds. It’s made of 100% silicone and cornstarch, creating a flexible mold material that maintains its shape. Commonly used in other crafting projects as well, silicone putty is cost-effective and easy to use at home. It allows you to create detailed and durable silicone molds.
The strength of Silicone Putty lies in its versatility. It can make anything from intricate shapes like letters or figurines all the way up to entire casts. This makes it a favorite amongst artists for beginner friendly mold making techniques.
Acetate sheets
Acetate sheets provide the frame that holds the mold together. They help to form a barrier between your mold material and your resin, preventing leakage.
These sheets will also allow you to easily remove the completed piece from finished mold without damaging its surface as it won't stick to either acrylic or silicone rubber materials used in making molds.
Resin tape
Resin tape is a silicone adhesive material designed for use in the mold making process. It is used for securing the frame during epoxy resin casting. Resin tape provides an effective watertight seal that prevents any leakage of resin while pouring or mixing. This helps keep your project mess-free, while ensuring a smooth finish. Additionally, its flexibility also makes it easy to apply around corners or bends wherein other materials might fail.
Resin tape is non-toxic and can last up to 6 months of exposure with proper storage, making sure you have plenty of time for creating amazing works of art!
Amazing Sealer
Amazing Sealer is an essential tool in resin mold making and a great way to ensure a perfect, air-tight seal between the mold and your subject. It creates a seamless bond between silicone rubber and acetate sheets. This ensures that no air or moisture will escape from your mold when pouring the resin for casting.
Its unique formulation increases adhesion to surfaces while reducing bubbles. This helps to prevent any leaking of material during curing or along seam lines. In addition, the amazing sealer also ensures easy release of casts after curing due to its non-toxic properties. It is an ideal product for use with permanent food grade molds, enabling you to make copies of intricate kitchen items such as cookie cutters!
Gloves, Stir sticks, Parchment paper
Gloves are an integral part of resin craft making for the purpose of hand safety. Wearing gloves protects your hands from dangerous chemicals, including those in resins, which can cause skin irritation and other health issues.
Stir sticks are used to help properly mix all components together, which is a critical step before pouring the resin mixture into molds. Additionally, it's also important to have some parchment paper. It can be used as either a protective layer between the mold and the finished product or as a mold release agent if needed.
Parchment paper reduces sticking issues during any kind of casting process. It also adds strength to molds when using flexible material such as silicone rubbers.
Step-by-Step Tutorial for Making Resin Molds

Start by preparing the frame, then mix and pour silicone into it before removing the created mold.
Prepare the frame
The first step of the mold making process is to create a sturdy and level frame. This frame helps hold the silicone in place while it sets, enabling you to achieve accurate and professional-looking resin molds.
When constructing the frame, be sure that all sides are even with each other. This will help ensure your desired shape and size can be met safely when casting resin into the mold.
Additionally, double check that no air bubbles are present in either additives or putty. This could make your final outcome look messy or uneven.
Mix the silicone
Mixing silicone for resin molds requires accuracy and patience, as it is a critical step in producing successful results. Start by gathering the necessary tools: silicone putty, acetate sheets, resin tape and an Amazing Sealer.
Take caution while measuring out equal parts of each component so they mix correctly. We recommend investing in syringes to accurately measure precise amounts. Combine thoroughly but be sure not to whip as it can cause air bubbles which can ruin your mold project.
Finally seal the edges with resin tape. You should allow considerable time for curing before attempting removal from the frame or use of a mold release product if preferred. With patience and skillful attention, you'll end up with perfect molds every time when mixing silicone this way!
Pour the silicone
Pouring the silicone into the mold is crucial in resin mold making. When pouring, it should be done slowly and evenly to avoid air bubbles forming in the mold before they are tapped out or blown away with a heat gun.
To get an even pour, you usually take several passes by switching between sides of the frame each time to prevent one side from getting overwhelmed with too much liquid at once which can cause air pockets.
Additionally, when measuring out your reservoirs for mixing your silicone, always use electronic scales rather than measuring cups. This will give you a more accurate result meaning fewer air bubbles.
Remove the mold
Once the resin has been poured and cured, it is important to remove the mold. Begin by cutting around any excess silicone that may have followed along with the frame of the mold. Carefully use a craft blade or spatula to separate each side of the silicone from one another around the edges of your casted item.
Some molds can be difficult to remove so patience is key here! Once fully separated, gently ease out your piece from within its shell-like form using rubber gloves for better grip.
Be careful when peeling away not to cause any damages as this will affect how well you can reuse your mold next time! Make sure all pieces are moved in unison with great caution and skill before finally releasing them from one another fully.
Types of Mold Making Materials
From silicone rubber to latex, there is a variety of materials available for those looking to make resin molds, so explore away!
Silicone rubber
Silicone rubber is a key material used in making resin molds for various art projects and craft items. It is becoming increasingly popular in the craft world due to its soft compound that quickly solidifies, making it easy to work with.
Traditionally, silicone rubber was obtained commercially. But artists can also create their own silicone mold putty at home using Silicone caulking and cornstarch.
Moreover, liquid silicone rubber can be poured over object models. They offer flexibility and durability when creating intricate designs or shapes. For those wanting an easier approach to resin mold making, we've also provided step-by-step instructions on how to make your own silicone molds from scratch.
Polyurethane rubber
Polyurethane rubber is also popular for making resin molds, thanks to its flexibility and effectiveness. It's a great choice if you're looking to create multiple castings of the same item. This material doesn't require using a release agent, meaning you don't need to apply coatings before using it.
In addition, polyurethane rubber can be mixed with other materials such as foam, epoxy, silicone rubber, or turf adhesive. This creates better casts that are stronger and have more precise shapes.
With its versatility and ease of use (as compared to latex or plaster molds which require more time), polyurethane rubber certainly makes for an ideal material in creating quick yet effective resin molds for casting parts from concrete or plaster molds.
Latex
Latex is available in pre-vulcanized liquid form, which makes it easy to work with and very versatile. When used to create a resin mold, latex is applied in multiple layers over the object you’re using as the model.
As each layer sets, additional layers can be added on top for greater durability until the desired shape is achieved. Latex molds are incredibly versatile. They can replicate intricate details from 3D objects with one flat side and provide long-lasting results due its durable nature when dried correctly.
Compared to other common mold making materials such as silicone rubber or polyurethane rubber, latex forms resilient molds that retain their texture and shape even after many replications. It also takes less time to dry than any other mold making material available.
Frequently Asked Questions (FAQs)
What supplies do you need to make a resin mold?
Making a resin mold requires some specialized materials. The most important is two-part silicone, which forms the base of the mold. Silicone putty, acetate sheets and resin tape can be used to strengthen your mold frame. Amazing Sealer creates an airtight seal over the top so you don't get any leakage during casting.
Stir sticks are needed for mixing properly and parchment paper keeps molds from sticking to surfaces while hardening. Depending on your project, additional supplies may be required such as 3D prints or latex material – so make sure to check before starting out!
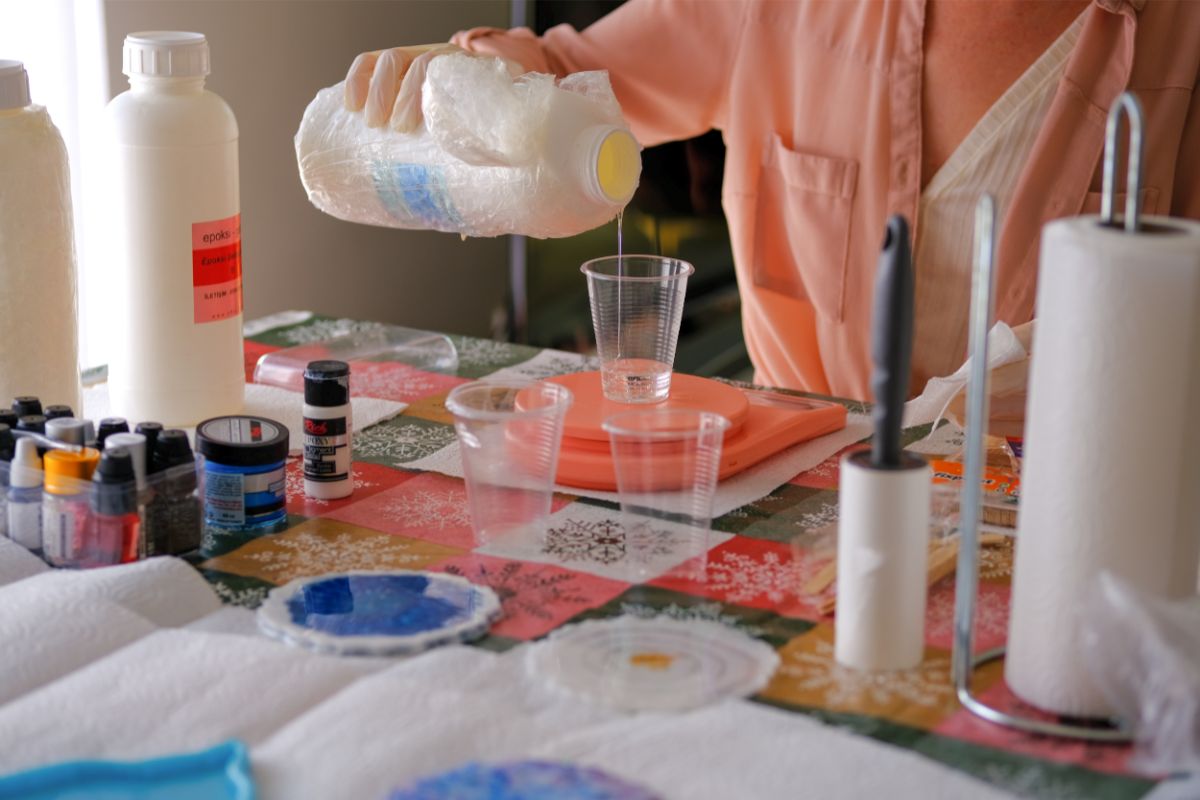
How do you mix resin for molds?
When working with resin molds, it's essential to ensure that you mix the two parts of the resin thoroughly. Different brands have different instructions for mixing but all emphasize the importance of thoroughness to achieve a successful casting.
When combining these two substances together, it creates a chemical reaction and produces heat which releases bubbles. This is why there needs to be extra care taken when performing this step.
Proper mixing reduces air bubble problems and improves the smoothness of your castings. Moreover, when pouring resin into silicone molds, tap or shake them lightly after they are filled. This helps to move any trapped air bubbles towards the surface so you can pop them before doing additional layers of pour-over if necessary.
How to use resin molds?
To use resin molds, first coat the mold with a mold release agent. Mix the epoxy resin according to the instructions, adding any desired color or additives. Pour the resin into the mold and allow it to cure. Once cured, carefully demold the resin piece, and finish as desired.
Conclusion
Making resin molds is a great way to create unique pieces of art and accessories for any project. Following the steps outlined in this tutorial, anyone can learn how to craft beautiful objects with resin.
Whether you are new to resin crafting or have some prior knowledge, it's important to always be aware of safety protocols and use manufacturer instructions when mixing and curing the resin.
With a little practice, everyone can become an expert at creating intricate castings using silicone molds as your guide! The creative possibilities are endless and make for truly fun projects that offer tremendous satisfaction time after time!
Leave a comment