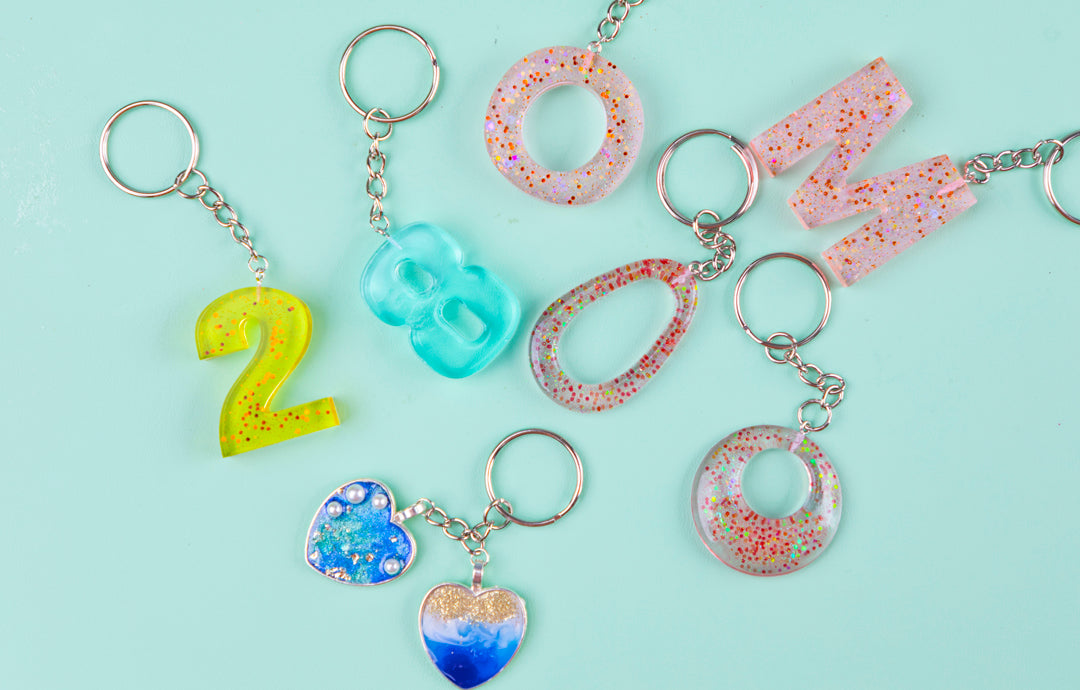
How to Make Resin Keychains: Unleashing Your Creative Flair

Are you looking for a fun and creative DIY project that allows you to showcase your personal style? Look no further than making your own resin keychains! In this blog post, we will guide you through the process and provide some creative ideas to help you make unique resin keychains that will stand out from the crowd.
Materials You'll Need:
Epoxy resin
Keychain molds (available in various shapes and sizes)
Pigments or acrylic paints
Glitter or other decorative elements (e.g., dried flowers, sequins)
Mixing cups, stirrers, and a heat gun or torch
Keychain rings or clips
Your imagination!
Step 1: Prepare Your Workspace
Before getting started, set up a clean and well-ventilated workspace. Lay down a protective sheet or use a craft mat to avoid any mess or spills. Make sure all your materials are within easy reach and organized.

Step 2: Mix Your Resin
Follow the instructions on your epoxy resin kit to mix the resin and hardener in the designated ratio. Pour both components into a mixing cup and stir gently but thoroughly. Be careful not to introduce too many air bubbles while stirring.

Step 3: Add Color and Sparkle
Now comes the fun part! Add a few drops of pigments or acrylic paints to the resin mixture and stir until you achieve your desired color. Experiment with different shades or create a marbled effect by swirling complementary colors together. Sprinkle in some glitter or other decorative elements to add a touch of sparkle and personality.

Step 4: Pour with Panache
Once your resin mixture is ready, it's time to pour it into the keychain molds. Get creative with your pouring technique – you can pour a solid layer, create vertical stripes, or even pour in multiple layers to add depth and dimension to your design. Don't be afraid to try different patterns or combinations to make each keychain unique.

Step 5: Eliminating Bubbles
To ensure a smooth and bubble-free finish, use a heat gun or torch to carefully pass over the surface of the resin. The heat will cause any air bubbles to rise and pop. Move the heat source in a continuous motion, ensuring you don't heat the resin for too long in one spot.

Step 6: Unleash Your Creativity
Once your keychains are fully cured according to the resin manufacturer's instructions, it's time to remove them from the molds. Voila! You now have a beautiful resin keychain. But don't stop there – let your creativity run wild! You can further personalize your keychain by adding additional elements, such as small charms, miniature figurines, or even embedding tiny photographs.

Step 7: Attach the Keychain Hardware
To turn your resin creations into functional accessories, attach keychain rings or clips. These can be easily found at craft stores or online. Choose a style that best suits your design and securely attach it to your keychain. Now you're ready to attach your extraordinary creation to your keys, backpack, or purse!


Making resin keychains is not only a fun and engaging craft, but also a fantastic way to express your individuality. These personalized accessories also make thoughtful gifts for friends and loved ones. So, grab your materials, unleash your creativity, and let your resin keychain-making adventure begin! Remember, the possibilities are endless, and the only limit is your imagination. Happy crafting!
FAQ:
1. How long does it take for resin to cure?
The curing time of resin can vary depending on the brand and type you are using. Typically, it takes around 24-48 hours for resin to fully cure. However, it's essential to follow the specific instructions provided with your resin product for accurate curing times.
2. Can I use any silicone mold for making resin keychains?
Yes, you can use various silicone molds for making resin keychains. There are countless options available in different shapes and sizes, allowing you to explore your creativity. Just ensure that the mold is specifically designed for resin casting and is heat resistant.
3. Is it necessary to wear protective gloves while working with resin?
Yes, wearing protective gloves is highly recommended when working with resin. Resin can be sticky and may cause allergic reactions or skin irritations for some individuals. Protective gloves will protect your hands and ensure your safety during the crafting process.
4. Can I mix different colors and pigments in resin?
Absolutely! Mixing different colors and pigments in resin is a fantastic way to create unique and customized designs for your keychains. Experiment with different color combinations and try adding glitter or other embellishments to enhance the visual appeal.
5. How can I fix air bubbles in my resin keychain?
To fix air bubbles in your resin keychain, gently blow on the surface using a heat gun or a straw to direct warm air over the bubbles. You can also use a toothpick or a needle to pop any visible bubbles. Prevention is key, so make sure to mix the resin thoroughly and avoid excessive pouring to minimize bubble formation.
6. How can I achieve a glossy finish on my resin keychain?
To achieve a glossy finish on your resin keychain, you can apply a clear resin topcoat once the initial layers have cured. Follow the instructions provided with the clear topcoat resin for proper application. This will not only add shine but also provide an extra layer of protection to your keychain.


Leave a comment