
How To Pour Resin: A Step-by-Step Guide

Resin has become an increasingly popular material for various art and craft projects. Its versatility and glossy finish make it an excellent choice for creating stunning pieces. If you're new to working with resin, learning how to pour it properly is essential. In this article, we will guide you through the steps on how to pour resin, ensuring successful and beautiful results.
Materials Needed
Resin
Hardener
Mixing container
Stirring stick
Safety goggles
Gloves
Silicone molds or surfaces
Heat gun or a butane torch (optional)
Leveling tool (optional)
Step 1: Prepare your workspace
Before you begin, make sure you have a clean, well-ventilated workspace. Lay down a protective cover to catch any drips or spills. Wear safety goggles and gloves to protect your eyes and skin.
Step 2: Measure and mix the resin
Carefully measure the required amount of resin and hardener according to the instructions provided by the manufacturer. Pour them into a mixing container and stir thoroughly using a stirring stick. Ensure that the resin and hardener are mixed well to avoid any uncured spots.
Step 3: Remove bubbles
To ensure a smooth and bubble-free pour, you can use a heat gun or a butane torch to gently pass over the surface of the mixed resin. This will eliminate any trapped air bubbles. Be cautious not to overheat the resin or hold the heat source too close to prevent any damage to the surface.
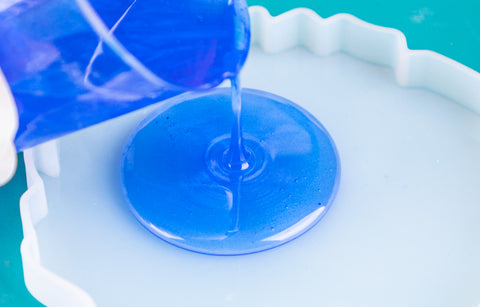
Step 4: Pour the resin
Pour the mixed resin into your desired silicone mold or onto the surface. Start in the center and let it flow naturally. If you're using multiple colors or layers, pour each layer when the previous one is partially cured but still sticky. This will allow for better adhesion between layers.
Step 5: Level and manipulate the resin
Use a leveling tool or gently tilt the mold or surface to ensure an even distribution of the resin. This will help eliminate any uneven surfaces or puddles. If needed, you can also manipulate the resin using a stirring stick or toothpick to create unique designs or effects.
Step 6: Remove bubbles (again)
After pouring the resin, you may notice small bubbles rising to the surface. To remove them, gently blow on them through a straw or use a heat gun or torch to pass over the surface. This step will give your project a flawless finish.
Step 7: Curing process
Allow your resin project to cure in a dust-free and well-ventilated area, following the manufacturer's recommended curing time. Avoid disturbing the resin during this process to prevent any imperfections.
Step 8: Finishing touches
Once fully cured, carefully remove your resin creation from the mold or prepare the surface by sanding or polishing if necessary. Clean the surface with a mild detergent to remove any residue and enjoy your beautiful, glossy resin masterpiece.
Conclusion
Pouring resin can be a rewarding and enjoyable experience. By following these steps and taking the necessary safety precautions, you can create stunning resin creations with a professional finish. Remember to experiment, have fun, and let your creativity flow. Happy pouring!
Disclaimer: Please note that working with resin involves the use of chemicals and safety precautions. Always follow the manufacturer's instructions and take appropriate safety measures to protect yourself and your surroundings.
FAQ
Q: Is resin pouring messy?
A: Well, let's be honest, resin pouring can get a little messy if you're not careful. But fear not! By prepping your workspace with a cover and wearing gloves, you can minimize any potential mess. Just remember to take your time, be mindful of your movements, and have some paper towels handy for quick cleanups.
Q: Can I mix different colors of resin together?
A: Absolutely! Mixing different colors of resin can create stunning and unique effects. You can use liquid dyes, powders, or pigments specifically designed for resin to achieve your desired look. Remember to mix the colors thoroughly and experiment with different combinations to create your own style.
Q: How do I prevent resin from sticking to the mold?
A: You definitely don't want your masterpiece to get stuck in the mold! To prevent this, you can apply a mold release agent before pouring the resin. This will help the cured resin release easily from the mold without any hassle. Be sure to follow the manufacturer's instructions for the mold release product you are using.
Q: Can I use resin for outdoor projects?
A: Yes, you can use resin for outdoor projects, but it's important to choose a resin that is specifically formulated for outdoor use. These resins are UV-resistant and are designed to withstand the elements. Keep in mind that even with a UV-resistant resin, some colors may fade over time when exposed to direct sunlight. It's a good idea to consult the manufacturer's instructions for the best practices on outdoor resin projects.
Q: Can I add objects or embed items in resin?
A: Absolutely! Embedding objects or adding special items to your resin creations can add a personal touch and make them even more unique. Just make sure that the items you're adding are suitable for resin and won't react negatively with it. For delicate objects, it's a good idea to seal them beforehand to ensure they won't be damaged by the resin.
We hope these FAQs answered some of your burning questions. Remember, don't hesitate to experiment, and embrace the joy of resin pouring! If you have any additional inquiries, feel free to reach out to us. Happy pouring, mate!
Leave a comment